
 日本語
日本語
 한국어
한국어

Raspberry Pi 5 Projects: When to Build a Custom PCB
QUICK ANSWER Raspberry Pi 5 projects range from home NAS servers to AI vision boxes, and most start out fine on a breadboard. A custom PCB becomes worthwhile once a build needs to survive vibration, fit inside a specific enclosure, or keep GPIO, I2C, and power connections reliable without loose jumper wires.
Every Raspberry Pi project starts the same way: a sensor here, an LED there, and a growing tangle of jumper wires that looks more like a science fair volcano than a finished product. It works, right up until a wire pulls loose or the whole thing needs to fit inside something smaller than a shoebox.
This guide covers some of the best Raspberry Pi 5 project ideas, then walks through the point where a custom PCB starts to make more sense than another handful of breadboard connections, down to what actually determines which manufacturer should build it.
What Is Raspberry Pi?
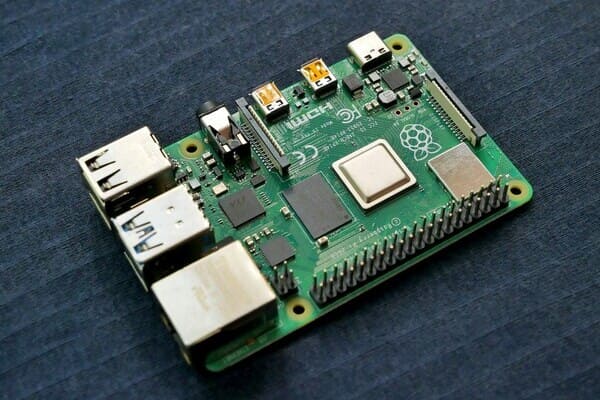
Raspberry Pi is a line of low-cost, credit-card-sized single-board computers that run a full Linux operating system while drawing only a few watts of power. The Raspberry Pi 5, released in October 2023, uses a 2.4GHz quad-core Arm Cortex-A76 processor and is available in memory configurations up to 16GB, a step up from the 4GB and 8GB options it launched with. It also added a PCIe 2.0 interface, the first Raspberry Pi generation to support it, which opens the door to faster storage and accessory boards. Every model in the current lineup, including the Pi 5, shares the same 40-pin GPIO header, which is why so many existing add-on boards and design references carry forward from one generation to the next.
Best Raspberry Pi 5 Projects
The right project for a Pi 5 usually comes down to how much processing headroom and I/O it needs, and the board's added CPU power and PCIe support open up builds that older Pi models handled poorly.
Home automation hub: A central controller running Home Assistant or a similar platform, tying together smart lights, thermostats, and sensors across a house through Zigbee or Wi-Fi.
Network attached storage (NAS): A low-power file server that stores backups, media, and shared documents on the local network, often paired with the Pi 5's PCIe interface for faster SSD storage.
Environmental sensor network: Multiple I2C sensors reporting temperature, humidity, and air quality from different rooms or an outdoor enclosure back to a central dashboard.
Retro gaming console: An emulation frontend running classic console and arcade titles, taking advantage of the Pi 5's faster CPU for smoother performance on more demanding systems.
AI vision project: A camera-based application for object detection or pose estimation, commonly paired with an add-on accelerator such as the Raspberry Pi AI Kit to handle inference locally.
A handful of these, like a quick retro gaming build, are perfectly happy staying on a breadboard or inside a stock case. Others, especially anything with multiple sensors, outdoor exposure, or a tight enclosure, start running into the limits of solderless prototyping fast.
Why You Need a Custom PCB
A custom PCB is worth the extra step once a project needs to behave the same way every time it's powered on, not just the first time it's tested on a desk. Four factors tend to decide whether that point has been reached.
Reliability under handling and vibration: Jumper wires and breadboard contacts loosen with movement and temperature change, which is a real problem for anything mounted in a vehicle, on a wall, or inside a moving enclosure.
Enclosure size: A properly laid out board can be a fraction of the footprint of the same circuit on a breadboard, which matters directly for wearables or anything meant to disappear into a small case.
Component count and complexity: Past a handful of sensors, regulators, and connectors, hand wiring becomes genuinely error-prone, and a schematic-driven PCB layout removes that guesswork.
Repeatability across units: Building more than one of the same device by hand invites inconsistency, while a PCB design can be reproduced identically every time it's ordered.
None of this means every Pi project needs a board. It means the decision is worth making deliberately, based on how the project is actually going to be used, rather than defaulting to jumper wires out of habit.

Understanding the Raspberry Pi GPIO Landscape
The Raspberry Pi 5's GPIO landscape centers on its 40-pin header, which exposes general-purpose I/O pins alongside 3.3V and 5V power rails, ground connections, and dedicated communication buses for I2C, SPI, UART, and PWM. Knowing which of these pins are flexible and which carry a fixed function is the first thing any carrier board or HAT design needs to get right, and the Raspberry Pi Foundation's own documentation is the authoritative reference for pin assignments.
The 3.3V rail on the header supplies limited current, so peripherals with meaningful power draw are usually better fed from the 5V rail or through an onboard voltage regulator rather than pulled directly off 3.3V. The I2C bus on pins 3 and 5 already includes onboard pull-up resistors, so adding a second set in a custom board's design can degrade signal quality rather than improve it. Designs intended to follow the official HAT specification, which allows EEPROM-based auto-configuration, need to match the mechanical and electrical requirements the Foundation publishes rather than improvising a similar layout.
Designing Your First Carrier Board
Designing a carrier board starts with the schematic, not the physical layout, since a board built on a shaky schematic just reproduces the same wiring mistakes in a more permanent form. Clearly labeled nets and correctly separated voltage domains at this stage save far more time later than jumping straight into component placement.
Decoupling capacitors belong next to every IC's power pin, typically a 100nF ceramic capacitor placed as close to the pin as the layout allows, to filter high-frequency noise before it reaches the rest of the power rail. Skipping them tends to produce intermittent, hard-to-trace behavior rather than a clean failure. The IPC-2221 generic standard for printed board design sets widely used baseline practices for trace spacing, thermal relief, and layer stack-up that are worth checking a design against even for a one-off hobbyist board.
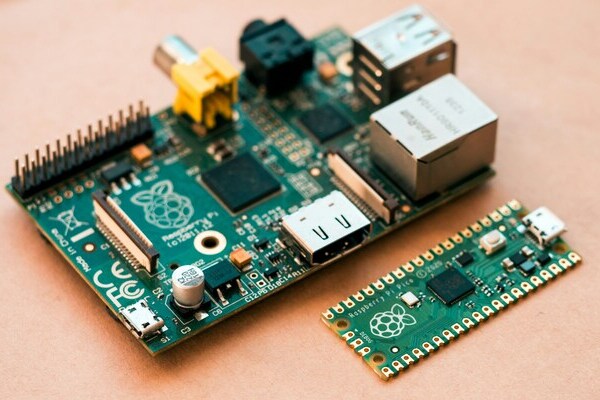
Mechanical constraints deserve attention at the same stage: mounting hole positions, connector orientation relative to the enclosure, and component height limits are all trivial to fix in a schematic and painful to fix after boards arrive. Verifying the 40-pin header footprint against the Raspberry Pi Foundation's official mechanical drawing before finalizing the layout avoids the single most common rookie mistake, a header shifted by a fraction of a millimeter that renders the whole board useless.
What to Look for When Choosing a Manufacturer for Your Carrier Board
Once a design is routed and checked, the manufacturer building it matters almost as much as the design itself, since even a correct schematic can turn into a bad board through a rushed or poorly controlled fabrication process. A few criteria are worth checking before placing an order.
Free design-for-manufacturability (DFM) review: A manufacturer that checks files for issues like trace width, annular ring size, and copper-to-edge clearance before production catches problems a solo hobbyist designer is likely to miss. PCBgogo runs a free DFM check on every order at no extra cost.
No minimum order friction: Hobbyist carrier boards are often one-off or small-batch runs, so a fabricator without a minimum cost requirement or reorder tooling charge, which is how PCBgogo structures its assembly service, fits that use case better than a supplier built around large production runs.
One-stop fabrication, assembly, and sourcing: Getting bare boards fabricated, components sourced, and SMD or through-hole parts assembled through a single provider avoids juggling separate vendors for a sensor board with a handful of small passives.
Verified quality control: Look for automated optical inspection (AOI) and electrical testing on finished boards, along with ISO-certified assembly, so defects get caught before a board reaches the workbench rather than after.
A board that passes DFM review, gets built by a fabricator with real quality checks in place, and arrives ready to populate turns a design file into working hardware without the trial and error that jumper-wire prototyping was meant to eliminate in the first place.
Conclusion
Most Raspberry Pi 5 projects start on a breadboard, and plenty of them should stay there. The ones that need to survive daily handling, fit a tight enclosure, or get built more than once are the ones worth turning into a properly designed, professionally manufactured carrier board.
Frequently Asked Questions
Do I need a custom PCB for every Raspberry Pi project?
No. Short-term tests, one-off demos, and projects that get taken apart again don't justify the extra design step. A custom PCB earns its place once a build needs to be reliable, compact, or reproduced more than once.
What's the difference between a HAT and a general carrier board?
A HAT (Hardware Attached on Top) follows the Raspberry Pi Foundation's official mechanical and EEPROM specification for auto-configuration, while a carrier board is any custom PCB built around the Pi's GPIO header without necessarily meeting that formal spec.
Which design software works best for a Raspberry Pi carrier board?
KiCad and EasyEDA are the two most common choices for hobbyist and prosumer PCB design, and both include footprint libraries for the 40-pin header. KiCad offers deeper control for more complex boards, while EasyEDA favors speed and a shorter learning curve.
Do I need to follow the official Raspberry Pi HAT specification?
Only if the board needs auto-configuration or is meant for wider distribution. A board built purely for personal use can skip strict HAT compliance, though understanding the specification's requirements still improves the design.
What surface finish should I choose for a carrier board?
HASL is the most common and least expensive option for simple hobbyist boards, while ENIG offers a flatter surface better suited to fine-pitch components. The right choice depends on the components being placed, not the project itself.





