From concept to reality: building your prototype circuit board-by PCBGOGO
From concept to reality: building your prototype circuit board-by PCBGOGO
In the world of electronics, turning an idea into a tangible product requires precision, expertise, and the right tools. One crucial step in this journey is prototyping your circuit board, the backbone of any electronic device. Today, we'll delve into the process of bringing your concept to reality, step by step, with the assistance of PCBGOGO, a trusted name in PCB prototyping.
Understanding the Basics.

Introduction:
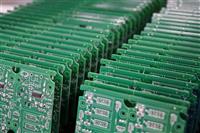
Before diving into the prototyping process, let's grasp the fundamentals. A printed circuit board (PCB) serves as the foundation for electronic components, providing mechanical support and electrical connections. Prototyping involves creating a preliminary version of your PCB design to test functionality and feasibility.
A PCB prototype serves as an early version of a product, crucial for testing the viability of a design. Unlike other prototypes, PCB prototypes must demonstrate functional capabilities to assess the overall design's effectiveness.
Various types of PCB prototypes cater to different stages of the design process:
· Visual Models: These prototypes offer a visual representation of the PCB design, showcasing its physical structure and component arrangement. They serve as initial models to facilitate design communication and review.
· Functional Prototypes: These prototypes closely resemble the final product in appearance and functionality, albeit with minor material differences to manage prototyping costs. They offer a realistic representation of the design's performance.
· Working Prototypes: Fully functional boards that incorporate all planned features and functions of the final product. They are utilized to identify any design flaws or weaknesses through testing and analysis.
· Proof-of-Concept Prototypes: Simple prototypes focused on replicating the primary function of the board, demonstrating the feasibility of the design concept. They provide evidence that the proposed design is workable.
Steps for prototyping Circuit board:
Step 1: Designing Your PCB
The journey begins with designing your PCB layout. Utilize software like Altium Designer, KiCad, or Eagle to create a schematic diagram and translate it into a physical layout. Pay attention to component placement, signal routing, and adherence to design guidelines.

Step 2: Generating Gerber Files
Once satisfied with your design, generate Gerber files—a standardized format used for PCB fabrication. These files contain information about copper layers, solder masks, silkscreen, and drill data. Most PCB design software packages offer built-in tools for generating Gerbers.
Step 3: Choosing a Prototyping Service
Selecting the right PCB prototyping service is crucial for ensuring quality and reliability. PCBGOGO stands out in this realm, offering a seamless experience coupled with a reputation for excellence. With a user-friendly interface, quick turnaround times, and stringent quality control measures, PCBGOGO has earned the trust of engineers and hobbyists alike.

Step 4: Uploading Your Design Files
Navigate to the PCBGOGO website and upload your Gerber files. Specify your requirements regarding material, thickness, surface finish, and quantity. PCBGOGO's intuitive platform guides you through the process, providing instant quotations and allowing for customization according to your needs.

Step 5: Reviewing and Confirming
Before proceeding with fabrication, carefully review the details of your order. Verify that all specifications align with your design requirements, and make any necessary adjustments. PCBGOGO's team of experts is available to address any concerns and ensure a smooth experience from start to finish.
Step 6: Fabrication and Assembly
Once confirmed, PCBGOGO's state-of-the-art facilities spring into action. Advanced manufacturing techniques are employed to produce your prototype with precision and accuracy. From PCB fabrication to component assembly, each step is meticulously executed to meet the highest standards of quality.
Step 7: Testing and Validation
With your prototype in hand, it's time to put it to the test. Perform comprehensive testing to evaluate functionality, performance, and reliability. PCBGOGO's commitment to quality means that your prototype undergoes rigorous inspection and testing protocols before leaving the facility.

Step 8: Iteration and Improvement
Based on test results and feedback, iterate on your design to address any issues or enhancements. Refine your PCB layout and repeat the prototyping process as needed until you achieve the desired outcome. PCBGOGO's flexible services allow for seamless iteration without compromising on quality or efficiency.
Conclusion
Bringing your ideas to life through PCB prototyping is a rewarding journey filled with challenges and triumphs. With PCBGOGO as your trusted partner, you can navigate this process with confidence and ease. From concept to reality, PCBGOGO empowers innovators to turn their visions into tangible prototypes, setting the stage for future technological advancements.
Embrace the journey of innovation with PCBGOGO by your side, and unlock the full potential of your creative endeavors.


